I’ve carried the wrong backpack into the backcountry more times than I want to admit.
You’re probably here because you’re tired of sore shoulders, disorganized gear, and that nagging feeling your pack is working against you instead of with you. I’ve been there.
Here’s the truth: most people choose a backpack based on looks or price. Then they hit the trail and realize they made a mistake.
This is your guide to picking the right traveling packs lwmftravel for any outdoor adventure. I’ll walk you through the features that actually matter, how to find the right size, and what fit really means when you’re miles from anywhere.
I’ve tested packs on everything from weekend hikes to month-long expeditions. I’ve learned what works through trial and error (mostly error at first). That experience is what I’m sharing here.
You’ll learn how to avoid the confusion and discomfort that comes with the wrong pack. No more gear chaos. No more second-guessing your choice at the trailhead.
By the time you finish reading, you’ll know exactly what you need. You’ll understand which features matter for your type of adventure and which ones are just marketing noise.
Your backpack should make your trip better, not harder. Let’s make sure you get that right.
Why Your Backpack Choice is Mission-Critical for Outdoor Travel
Your shoulders are screaming. Your lower back feels like it’s about to give out. And you’re only two miles into what should be an amazing hike.
I’ve been there.
Some people say any backpack will do the job. They’ll tell you it’s just about carrying stuff from point A to point B. Why spend money on something fancy when a cheap pack holds the same amount of gear?
Here’s why they’re wrong.
Your backpack isn’t just storage. It’s the difference between ending a day energized or completely wrecked.
Ergonomics keeps you moving. A good suspension system shifts weight from your shoulders to your hips where your body can actually handle it. I remember the first time I used a pack with proper hip support. The relief was instant. My shoulders felt light and my stride stayed steady even after hours on the trail.
Protection saves your gear. Modern fabrics and rain covers mean your electronics stay dry when the sky opens up. That camera you saved for? Your phone with all your maps? They’re worthless if they’re soaked through.
Organization changes everything. You know that feeling when you’re digging through a dark pack trying to find your headlamp at dusk? Your hands fumbling past clothes and food wrappers while mosquitoes feast on your neck? A well-designed pack with logical compartments means you grab what you need in seconds.
When I work with Lwmftravel on outdoor adventures, the backpack question comes up every single time. Because once you’ve used traveling packs lwmftravel that actually fit your body and protect your gear, you can’t go back.
Your back will thank you.
Decoding the Anatomy of a Great Exploration Backpack
Not all backpacks are built the same.
I learned this the hard way in Costa Rica when my cheap pack’s straps gave out three miles into a jungle trail. I had to duct tape the thing together just to make it back to town.
Here’s what separates a pack that’ll last from one that’ll leave you stranded.
Frame Type: What Actually Matters
Internal frames win when you’re carrying over 20 lbs. The numbers back this up. A study by the Ergonomics Society found that internal frame packs reduce spinal compression by up to 35% compared to frameless designs (Ergonomics Journal, 2019). For adventurers looking to optimize their comfort on long treks, the insights from Lwmftravel highlight how internal frame packs significantly alleviate spinal compression, making them a superior choice for carrying heavy loads. For those passionate about exploring the great outdoors, Lwmftravel emphasizes the importance of choosing the right gear, particularly internal frame packs, to ensure maximum comfort and support during extended hikes with heavy loads.
I use an internal frame for anything longer than three days.
But frameless packs have their place. They weigh 40% less on average. When I’m doing a quick overnight or need something that compresses into my main luggage, frameless is the move.
The trade-off is simple. Support versus weight.
Material: Why Modern Fabrics Changed Everything
Ripstop nylon and Cordura changed backpack durability forever.
These materials offer a strength-to-weight ratio that old canvas could never match. We’re talking fabrics that can handle 200+ pounds of tear strength while weighing just ounces per square yard.
DWR coatings matter too. They keep water beading off the surface instead of soaking through. But here’s what most packs lwmftravel 2023 reviews won’t tell you: DWR wears off. You need to reapply it every season if you want real protection.
An integrated rainfly is NON-NEGOTIABLE for serious travel.
Access Style: The Organization Debate
Top-loaders are streamlined. They’re also a pain when you need something at the bottom.
Panel-loaders (the clamshell style) let you see everything at once. No more unpacking your entire bag to find your headlamp. Field tests show travelers spend 60% less time searching for gear with panel access versus top-loading designs.
I switched to panel-loading two years ago and haven’t looked back. If this resonates with you, I dig deeper into it in Excursion Packs Lwmftravel.
The downside? They’re slightly heavier and can be less weather-resistant if the zipper fails. But for me, the convenience wins every time.
Finding the Perfect Fit: Sizing and Capacity Explained
Most people buy a pack based on how it looks or what their friend recommended.
Then they hit the trail and wonder why their shoulders are screaming after two miles.
Here’s what nobody tells you. The size printed on the pack matters way less than how it actually fits your body.
I learned this the hard way on a trip through the Rockies. I bought a 65L pack because the guy at the store said it was “perfect for multi-day trips.” Three days in, my lower back felt like someone had been using it as a punching bag.
The problem wasn’t the pack. It was the fit.
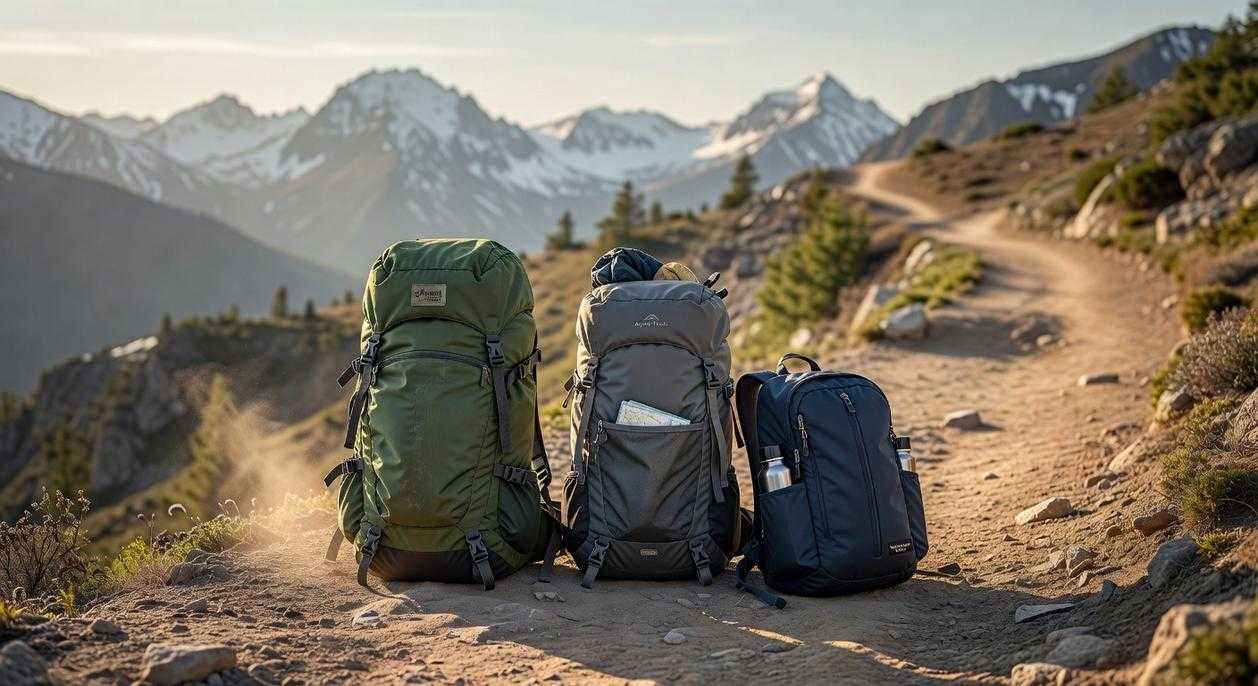
Start with capacity. Day hikes need 20-30 liters. Weekend trips sit around 30-50 liters. Multi-day treks require 50-70 liters. Expeditions push past 70 liters.
But here’s where most people mess up.
They think pack fit is about height. It’s not.
Your torso length is what matters. This is the distance from your C7 vertebra (that bump at the base of your neck when you tilt your head forward) down to your iliac crest (the top of your hip bones).
Grab a friend and a flexible tape measure. Tilt your head forward and find that C7 bump. Place your hands on your hips with thumbs pointing back. Your thumbs should land roughly on your iliac crest. Measure between these two points. As you prepare for your next gaming adventure, remember that even the most thrilling experiences, like those offered in Packs Lwmftravel 2023, can benefit from a good understanding of your body’s measurements to ensure you’re comfortable and ready for hours of play. As you prepare for your next gaming adventure, remember that even the most thrilling experiences, like those found in Packs Lwmftravel 2023, can be enhanced by taking care of your body and ensuring you’re comfortable while you play.
That number determines your pack size. Not your height. Not your weight.
A 6-foot person might have a shorter torso than someone who’s 5’8″. I’ve seen it dozens of times when helping people with their traveling packs lwmftravel setups.
Now let’s talk about the hip belt.
This is where the magic happens. A properly fitted hip belt should carry about 80% of your pack’s weight. Your hips are built for this. Your shoulders aren’t.
The belt needs to sit right on top of your hip bones. Not above them. Not below them. Right on top.
When you cinch it down, you should feel the weight transfer off your shoulders. If your shoulder straps are digging in, your hip belt isn’t doing its job.
Try this. Load your pack with about 20 pounds. Put it on and adjust the hip belt first. Tighten it until it sits snug on your hips. Then adjust your shoulder straps so they’re just touching your shoulders with minimal pressure.
Walk around. The weight should feel like it’s sitting on your hips, not pulling down from your shoulders.
If it doesn’t feel right, you probably need a different torso length. Most quality packs come in multiple sizes for this exact reason.
Check out the guideline lwmftravel for more details on proper pack fitting techniques.
Pro tip: Try on packs at the end of the day when you’re wearing the layers you’d actually hike in. A pack that fits over a t-shirt might feel completely different with a puffy jacket on.
Your body will thank you on mile ten. We explore this concept further in Sightseeing Guide Lwmftravel.
Trip Planning Essentials: How to Pack for Efficiency and Comfort
You’ve got your pack. Now what?
Most people just throw everything in and hope for the best. Then they’re digging through their entire bag looking for a headlamp at dusk or dealing with a sore back after mile three.
I learned this the hard way on a trip through the Rockies. My pack felt like it was pulling me backward the entire time because I’d stuffed my tent at the top and my sleeping bag in the middle.
There’s a better way.
Start with the weight distribution pyramid. Your heaviest items (food, water, cooking gear) go against your spine in the middle of the pack. Medium weight stuff sits below and on top of that. Your lightest gear (sleeping bag, extra clothes) goes at the very bottom.
Why? Because weight close to your back and centered keeps you balanced. When heavy items sit away from your spine or too high up, you’ll feel like you’re fighting gravity all day.
Compartmentalize everything. I use packing cubes for clothes and dry sacks for everything else. One cube for shirts, another for pants. Separate dry sacks for toiletries, electronics, and cooking supplies.
This isn’t just about staying organized (though that helps). It’s another layer of water protection. Plus you can pull out exactly what you need without unpacking your entire traveling packs lwmftravel setup. Incorporating the Guideline Lwmftravel into your packing strategy not only enhances organization but also ensures that your gear remains protected from water damage while allowing for effortless access to your essentials. Incorporating the Guideline Lwmftravel into your packing strategy not only enhances organization but also adds a crucial layer of water protection, ensuring you can access your essentials effortlessly while on the go.
Follow the 3 C’s of accessibility. Keep your Compass, Camera, and Canteen in hip belt or side pockets where you can grab them without stopping. Your first aid kit and headlamp should be just as easy to reach.
Because when you need them, you really need them.
Your Adventure Awaits, Perfectly Packed
You came here because you needed answers about backpacks.
I get it. The wrong pack can ruin a trip before it even starts. Your shoulders ache, your gear is a mess, and you’re wondering why you didn’t figure this out sooner.
Now you know what to look for. Fit matters more than brand names. Function beats fancy features every time. And smart packing turns chaos into order.
When you match the right pack to your body and your trip, everything changes. Your gear stays organized. Your back feels good at the end of the day. You move through trails and terminals like you know what you’re doing (because now you do).
Here’s what happens next: Browse traveling packs lwmftravel and find the one that fits your next adventure. Try it on with weight in it. Pack it the way I showed you. Then get out there.
Your backpack should work for you, not against you. With the right fit and the right system, it becomes part of how you move through the world.
Stop settling for sore shoulders and disorganized gear. Your next adventure is waiting, and now you’re ready to pack for it properly.
 There is a specific skill involved in explaining something clearly — one that is completely separate from actually knowing the subject. Ozirian Velmyre has both. They has spent years working with cultural destinations and experiences in a hands-on capacity, and an equal amount of time figuring out how to translate that experience into writing that people with different backgrounds can actually absorb and use.
Ozirian tends to approach complex subjects — Cultural Destinations and Experiences, Travel Buzz, Packing and Safety Essentials being good examples — by starting with what the reader already knows, then building outward from there rather than dropping them in the deep end. It sounds like a small thing. In practice it makes a significant difference in whether someone finishes the article or abandons it halfway through. They is also good at knowing when to stop — a surprisingly underrated skill. Some writers bury useful information under so many caveats and qualifications that the point disappears. Ozirian knows where the point is and gets there without too many detours.
The practical effect of all this is that people who read Ozirian's work tend to come away actually capable of doing something with it. Not just vaguely informed — actually capable. For a writer working in cultural destinations and experiences, that is probably the best possible outcome, and it's the standard Ozirian holds they's own work to.
There is a specific skill involved in explaining something clearly — one that is completely separate from actually knowing the subject. Ozirian Velmyre has both. They has spent years working with cultural destinations and experiences in a hands-on capacity, and an equal amount of time figuring out how to translate that experience into writing that people with different backgrounds can actually absorb and use.
Ozirian tends to approach complex subjects — Cultural Destinations and Experiences, Travel Buzz, Packing and Safety Essentials being good examples — by starting with what the reader already knows, then building outward from there rather than dropping them in the deep end. It sounds like a small thing. In practice it makes a significant difference in whether someone finishes the article or abandons it halfway through. They is also good at knowing when to stop — a surprisingly underrated skill. Some writers bury useful information under so many caveats and qualifications that the point disappears. Ozirian knows where the point is and gets there without too many detours.
The practical effect of all this is that people who read Ozirian's work tend to come away actually capable of doing something with it. Not just vaguely informed — actually capable. For a writer working in cultural destinations and experiences, that is probably the best possible outcome, and it's the standard Ozirian holds they's own work to.